🎉 ⏱ Ready to build? Get early access now!⏱ 🎉

Reward an NFT for watching a YouTube video
A web-app that gives you NFTs upon successfully watching educational youtube videos.
Most of us learn on the internet. We spend hours watching youtube videos and reading long articles to learn about new skills. Unlike educational institutions, we don't get certificates for learning on the internet. Eg: I've learnt how to write Solidity on YouTube, but there's no way I can prove I've watched a Solidity course on YouTube to someone else.
This application will create 'Proof of viewership' NFTs which are rewarded for completing YouTube videos, and can therefore be used to represent completion of educational video courses.
Let's get started!
Dashboard setup
The first thing we need to do is head over to the dashboard and create a project and an NFT Collection module. if you don't know how to do this, check out this guide.
I'm naming my collection - SuperNFT and its symbol is $SUPR.
Once you created your module, you'll reach the following page:
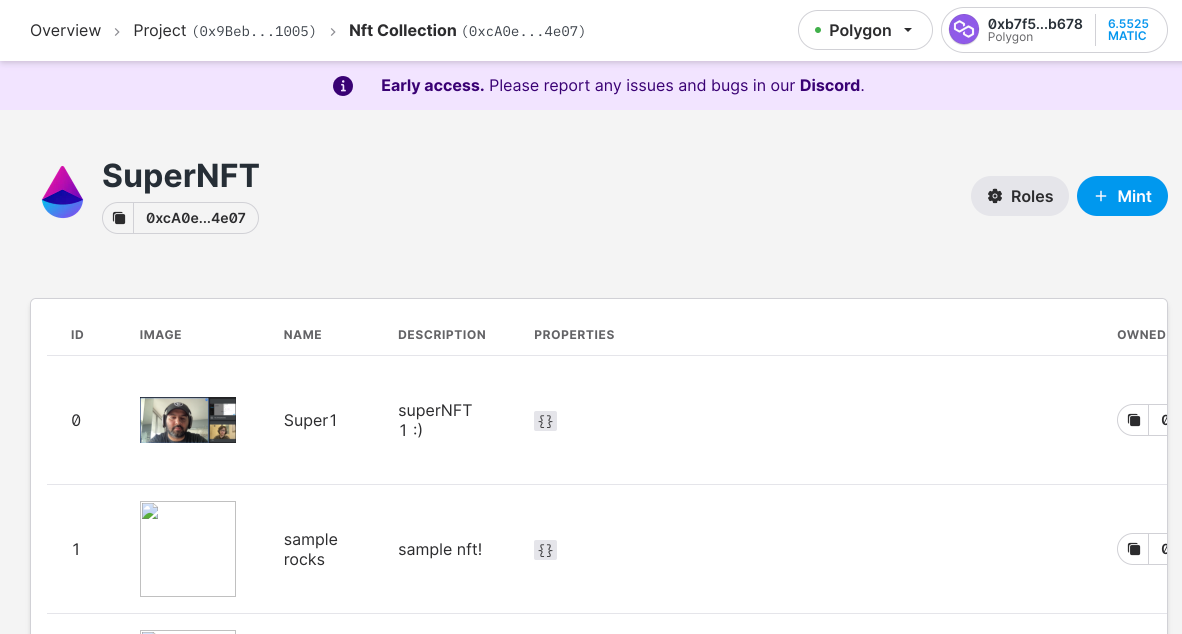
You won't need to add any NFTs at this stage as we'll be minting the NFTs programatically.
#3 Set up your React Frontend
I'll be using React for the frontend of our app, you can use anything you're comfortable with.
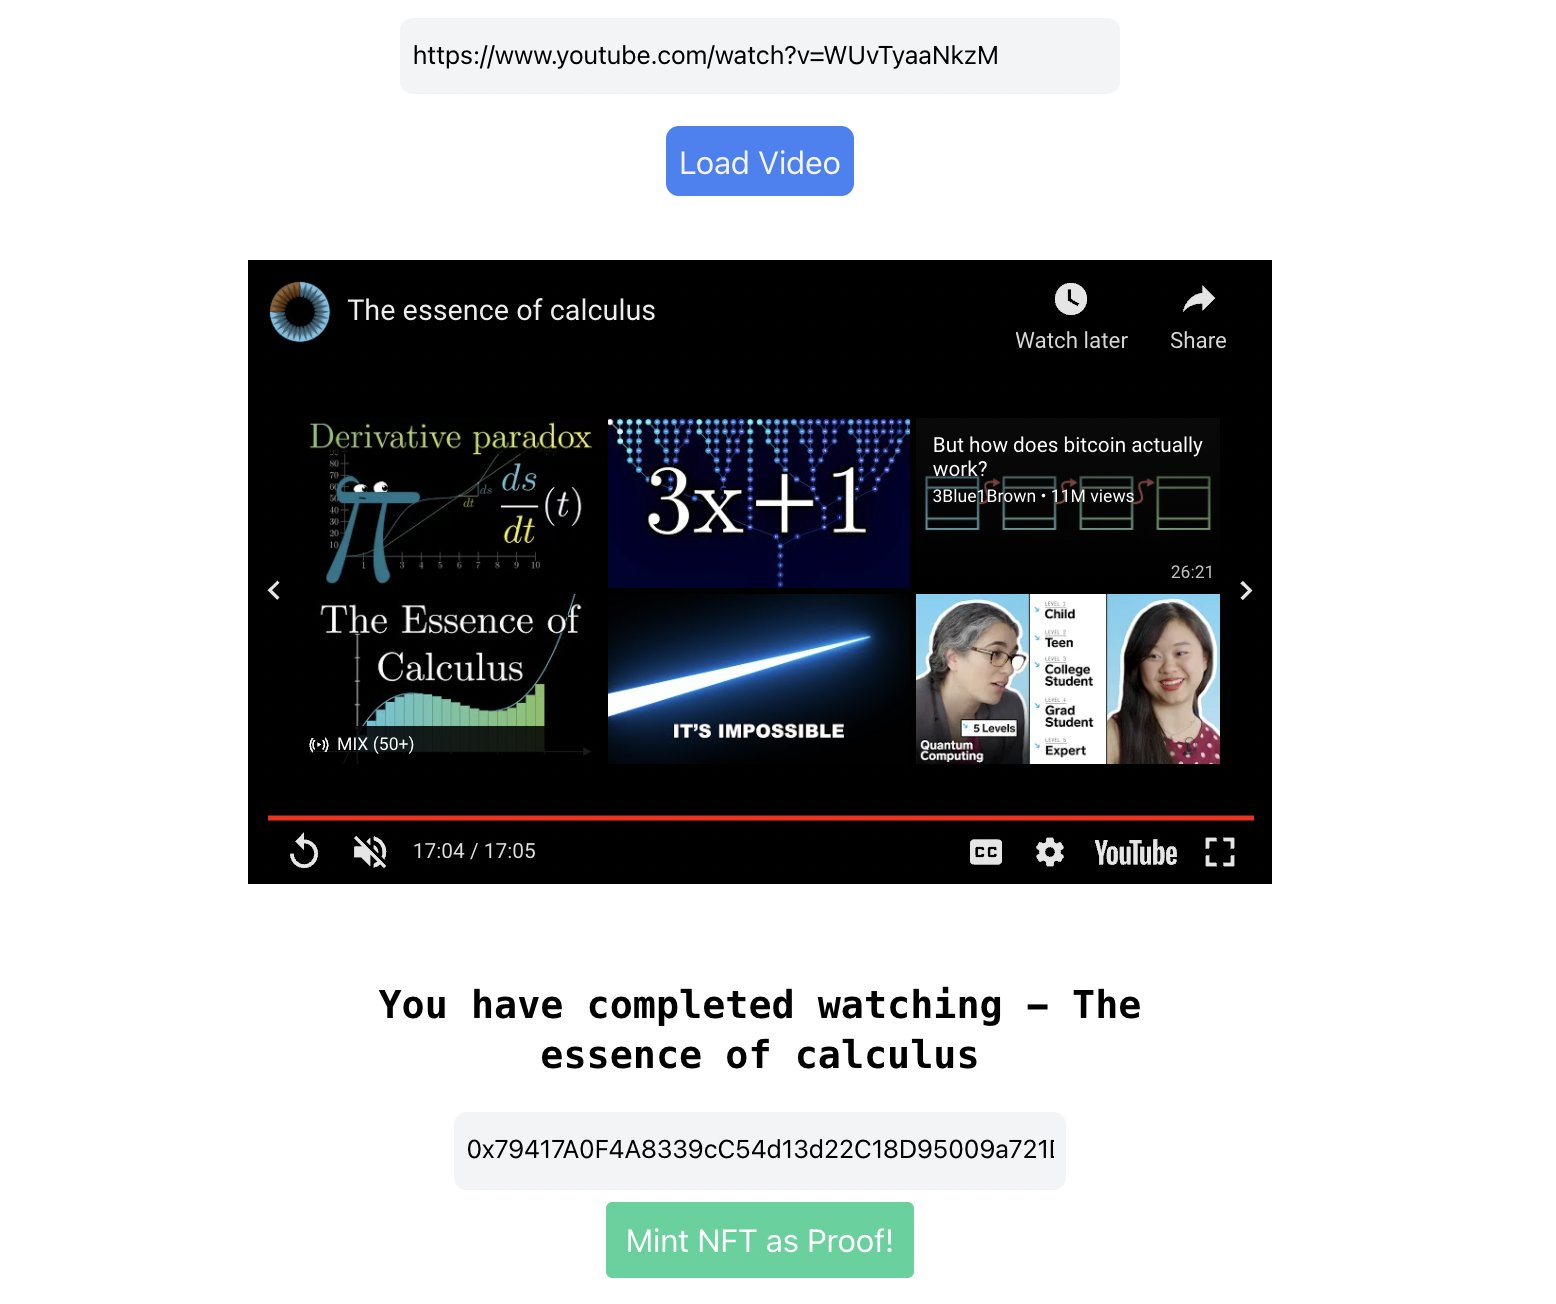
The objective of the frontend is to help the user watch a youtube video, verify if they've seen it fully and then issue a command to the backend to mint a NFT for the user.
I have written down all the code for the frontend to run a YouTube video, prevent the user from skipping forward beyond 10 seconds and take a wallet address as input.
The wallet address + video url + video title are sent to the backend as well! Here's the Replit link to the code, feel free to clone and build on top of this. Won't explain much about this because it's simple React code and additional details about how I'm controlling the YouTube video are in these docs.
import React from "react"; import "./App.css"; function MyApp() { const [videoURL, setvideoURL] = React.useState(""); const [address, setAddress] = React.useState(""); const [loading, setLoading] = React.useState(false); const [watchedVideo, setwatchedVideo] = React.useState(false); const [image, setImage] = React.useState(""); const [name, setName] = React.useState(""); const [minted, setMinted] = React.useState(false); let videolength = 0; let watchLength = 0; function myfetch(url, options, timeout = 7000) { return Promise.race([ fetch(url, options), new Promise((_, reject) => setTimeout(() => reject(new Error("timeout")), timeout), ), ]); } async function mintNFT() { setMinted(true); setLoading(true); const data = JSON.stringify({ name: name, address: address, url: videoURL, }); myfetch( `your backend api URL`, { // Adding method type method: "POST", // Adding body or contents to send body: data, headers: { "Content-type": "application/json; charset=UTF-8", }, }, 300000, ) .then((result) => result.json()) .then((response) => { setImage(response.image); setLoading(false); }); } var player; function onYouTubeIframeAPIReady() { console.log(videoURL); player = new YT.Player("player", { height: "390", width: "640", videoId: videoURL, playerVars: { playsinline: 1, }, events: { onReady: onPlayerReady, onStateChange: onPlayerStateChange, }, }); } function onPlayerReady(event) { var total_time = player.getDuration(); console.log(total_time); const title = player.getVideoData().title; console.log(title); setName(title); videolength = parseInt(total_time); event.target.playVideo(); } function onPlayerStateChange(event) { const current_time = player.getCurrentTime(); console.log(videolength, current_time, watchLength); if (current_time - watchLength > 10) { player.seekTo(watchLength, true); setTimeout(() => { onPlayerStateChange(); }, 200); } else if (videolength - current_time < 2) { setwatchedVideo(true); watchLength = current_time; console.log("Video watched"); setTimeout(stopVideo, 500); } else if (current_time - watchLength < 10) { console.log; watchLength = current_time; setTimeout(() => { onPlayerStateChange(); }, 200); } } function stopVideo() { player.stopVideo(); } function handleData(data) { if (data.length != 42) { window.alert("Please enter valid wallet address"); } else { console.log(data); setAddress(data); } setMinted(false); } return ( <div className="grid justify-items-center"> <input onChange={(e) => { setvideoURL(e.target.value.substr(32)); }} className="m-5 focus:border-blue-400 border-3 p-2 focus:outline-none rounded-lg w-1/4 h-12 bg-gray-100" placeholder="Youtube Video URL" /> <button onClick={onYouTubeIframeAPIReady} className="text-gray-100 text-xl p-2 rounded-lg hover:bg-blue-900 bg-blue-500" > Load Video </button> <div className="mt-10" id="player"></div> {watchedVideo ? ( <div className="mt-10 w-full grid justify-items-center"> <input onChange={(e) => { handleData(e.target.value); }} className="m-5 focus:border-blue-400 border-3 p-2 focus:outline-none rounded-lg w-3/4 h-12 bg-gray-100" placeholder="Polygon Public Address" /> <button onClick={mintNFT} className="text-gray-100 text-xl p-2 rounded-lg hover:bg-green-900 bg-green-500" > Mint NFT as Proof! </button> {minted ? ( <div> {loading ? ( <div className="mt-20 grid justify-items-center"> <img src="https://c.tenor.com/5o2p0tH5LFQAAAAi/hug.gif" /> </div> ) : ( <div className="mt-20 grid justify-items-center"> <img src={"data:image/png;base64," + image} /> <h1 className="text-xl font-mono font-bold mt-10"> NFT successfully minted to {address} :) </h1> </div> )} ; </div> ) : null} </div> ) : null} </div> ); } export default MyApp;
The only line you'd want to change in this code is the URL space on line 32 where it says "your backend api URL".
#4 Backend in Python with the Thirdweb SDK
Now we come to creating programmable NFTs.
I'm going to be using FastAPI to make the backend, you can use whatever works best for you. The Python code to mint NFTs remains the same.
First off, download FastAPI, the thirdweb Python SDK and a few more dependencies.
pip install fastapi uvicorn thirdweb-sdk firebase-admin textwrap Pillow
Let's first write the code for minting a NFT, then we'll wrap it up in a simple API. You can go through the thirdweb Python SDK docs here.
First, we need to get the imports out of our way -
from thirdweb import ThirdwebSdk, SdkOptions, MintArg
Then, initialise the SDK using the helper functions provided. The code should look something like this -
# Conncect to the SDK # The polygon-rpc.com is the official Polygon Mainnet RPC sdk = ThirdwebSdk(SdkOptions(), "https://polygon-rpc.com") # You'll need wallet's private key here, you can find them in your wallet. # WARNING: Never share this with anyone, it gives permission to use your wallet in your behalf sdk.set_private_key("your private key")
Note - If you're using the Ethereum testnet, your RPC will be different. A simple Google search will give you a list of acceptable RPCs. Also, your private key here will be used to pay gas fees for minting all the NFTs. If you want the user to pay gas fees for each NFT they mint, the setup will be slightly different, but this is simpler to understand and hence we'll follow this for now!
Now, we'll need the address that is found on your NFT Collection Module dashboard -
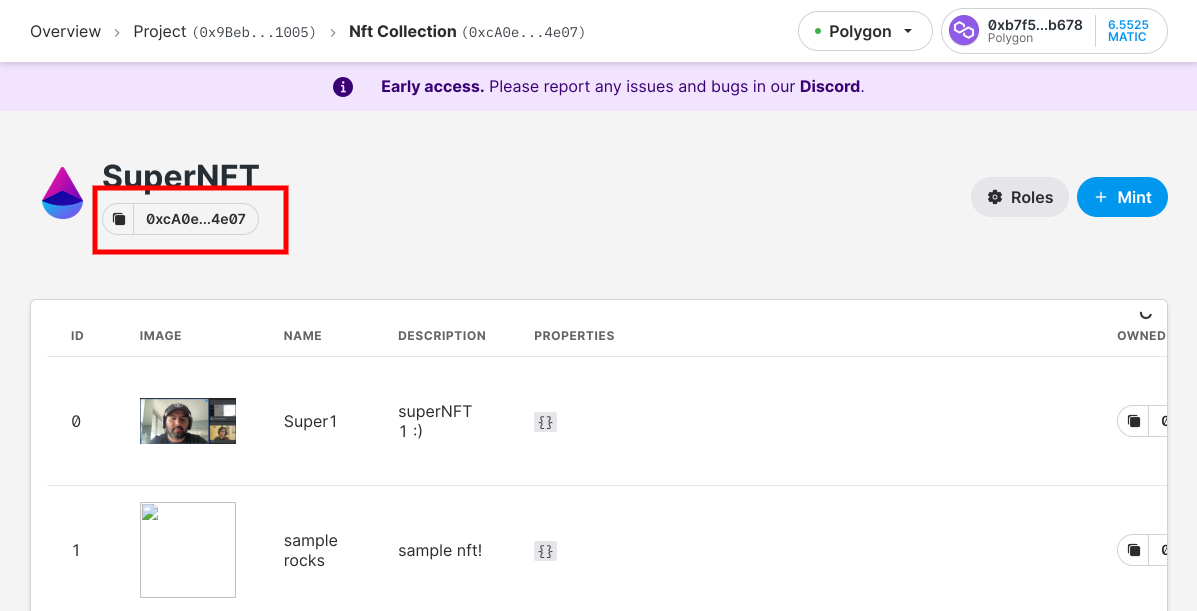
Copy the address and connect to our project's NFT Module. We do this by using the following function -
nft_module = sdk.get_nft_module("Your NFT Module address")
Great! You're almost done. Now we need to figure out a way to mint an NFT to our user's URL with some data. The python SDK provides a single-line function to all of this.
mint = nft_module.mint_to("receiver's address", MintArg(name="Name of NFT", description="Description of NFT", image_uri="URL of content to be served via the NFT", properties={})) # the properties dictionary gives you the freedom to put any other metadata on the NFT.
Putting everything together, this is how your minting code should look -
from thirdweb import ThirdwebSdk, SdkOptions, MintArg sdk = ThirdwebSdk(SdkOptions(), "https://polygon-rpc.com") sdk.set_private_key("your private key") nft_module = sdk.get_nft_module("your NFT module's address") mint = nft_module.mint_to("receiver's address", MintArg(name="Name of NFT", description="Description of NFT", image_uri="URL of content to be served via the NFT", properties={}))
That's it! It's just 5 lines of code. With this, you can connect to your smart contract (which thirdweb makes for you in the background), connect your wallet, mint an NFT and put some data on it. Told you thirdweb is awesome 😜
If you try running this code, you might get an error like this -

Please note - Your NFT will get minted and you'll be able to see a reduction in your wallet balance after paying gas fees. This error will be fixed soon, it doesn't affect your NFT though 🙂
One thing you'll notice here is that we need a URL for our content that needs to go behind the NFT. We have one more challenge here, we need to create an image based on the information we're getting from the frontend, store it somewhere, get the URL and then pass it to the NFT.
I'm going to be using pillow and textwrap to create an image based on the information I'm getting from the frontend. And I'll be using firebase to store the image and get a URL to access it -
from PIL import Image, ImageDraw import textwrap from firebase_admin import credentials, initialize_app, storage from datetime import datetime # creds.json can be downloaded once you setup your firebase project # bucket id is seen on the storage page of your firebase project cred = credentials.Certificate("creds.json") initialize_app(cred, {'storageBucket': 'your storage bucket id'}) # test.png is a plain grey background image I want to create my NFTs on img = Image.open('test.png') now = datetime.now() dt_string = now.strftime("%d/%m/%Y %H:%M:%S") draw = ImageDraw.Draw(img) spacing = 20 text = "this is text that goes on top" text2 = "this is text that goes in the bottom" + dt_string # drawing text size draw.text((8, 8), text, fill="white", spacing=spacing, align="left") draw.text((8, 180), text2, fill="yellow", spacing=spacing, align="left") img.save('img.png') fileName = 'img.png' bucket = storage.bucket() blob = bucket.blob(fileName) blob.upload_from_filename(fileName) blob.make_public() print("your file url", blob.public_url)
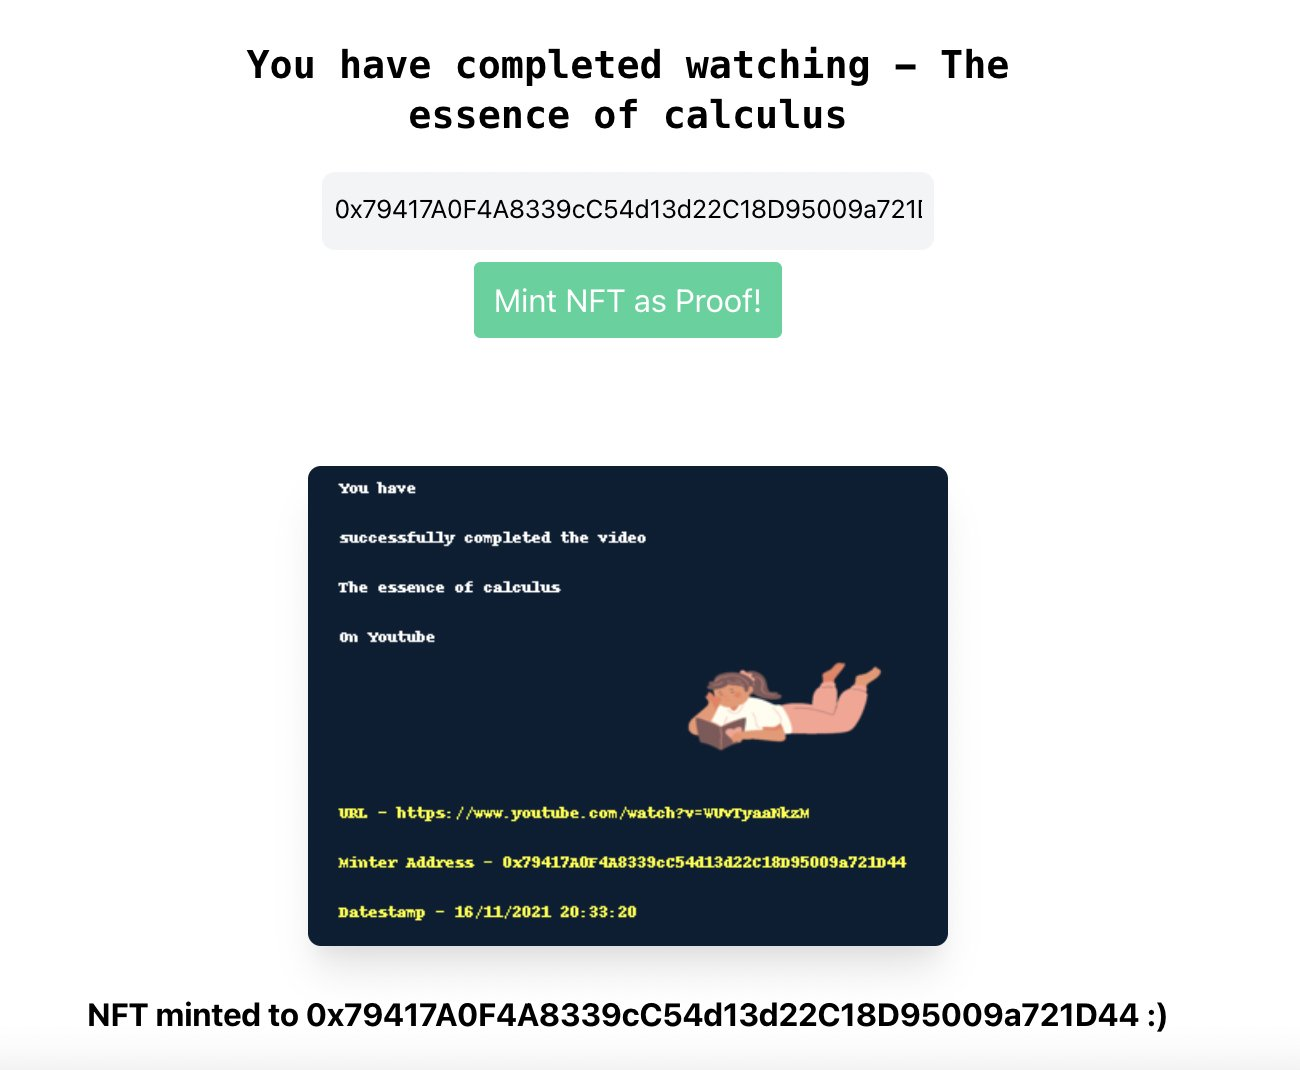
Again, I've done most of the heavy-lifting here to write all the code. The above code snippet writes text and text2 on top of img.png which is a simple grey background image I found on the internet. It also takes the datestamp of the time you run this code and adds that to the text written on the image. That way, you know when the image and subsequently the NFT was created. It then puts the edited image on Firebase and gets back a URL to access the image. You'll have to setup a Firebase project and get your JSON keys + bucket name from there for this to work. Checkout these docs for more information.
Now let's make a quick FastAPI wrapper that takes all data from frontend, uses all the code we wrote above and mints a NFT.
from thirdweb import ThirdwebSdk, SdkOptions, MintArg from fastapi import FastAPI, File, UploadFile, Response from pydantic import BaseModel import base64 import math import uvicorn from datetime import datetime from PIL import Image, ImageDraw, ImageFont import textwrap from fastapi.middleware.cors import CORSMiddleware from fastapi.responses import JSONResponse from fastapi.encoders import jsonable_encoder from fastapi.middleware.cors import CORSMiddleware from firebase_admin import credentials, initialize_app, storage # Init firebase with your credentials cred = credentials.Certificate("creds.json") initialize_app(cred, {'storageBucket': 'your bucket URL'}) app = FastAPI() origins = ["*"] app.add_middleware( CORSMiddleware, allow_origins=origins, allow_credentials=True, allow_methods=["*"], allow_headers=["*"], ) class Item(BaseModel): name: str url: str address: str @app.post("/mint") def mint(item: Item): print(item.name) local_name = item.name+item.address local_name = local_name.replace(" ", "") + '.png' img = Image.open('test.png') now = datetime.now() dt_string = now.strftime("%d/%m/%Y %H:%M:%S") draw = ImageDraw.Draw(img) spacing = 20 text = """ You have successfully completed the video """ + item.name + """ On Youtube""" text2 = """ URL - """ + item.url + """ Minter Address - """ + item.address + """ Datestamp - """ + dt_string # drawing text size draw.text((8, 8), text, fill="white", spacing=spacing, align="left") draw.text((8, 180), text2, fill="yellow", spacing=spacing, align="left") img.save(local_name) with open(local_name, "rb") as img_file: my_string = base64.b64encode(img_file.read()) my_data = jsonable_encoder({"image": [my_string]}) # Put your local file path fileName = local_name bucket = storage.bucket() blob = bucket.blob(fileName) blob.upload_from_filename(fileName) blob.make_public() print("your file url", blob.public_url) sdk = ThirdwebSdk(SdkOptions(), "https://polygon-rpc.com") sdk.set_private_key("your private key") nft_module = sdk.get_nft_module("your NFT Collection module address") print(nft_module.mint_to(item.address, MintArg(name=item.name, description="The owner of this NFT has watched a youtube video in its entirety", image_uri=blob.public_url, properties={"name": item.name, "url": item.url}))) return JSONResponse(my_data) if __name__ == "__main__": uvicorn.run(app, host="0.0.0.0", port=8000)
Note - Once our NFT image is prepared, I convert the locally saved image to a base64 string that is passed to the frontend. The frontend renders that string in an IMG tag and shows the user how their NFT looks.
You can take this Python code snippet, replace it with your credentials and then run it anywhere. I recommend Replit's always-on feature to host this API while you're testing because it's super easy to debug if something goes wrong. After running this API, you can make an actual query from the frontend with your address after watching a video and you'll be able to see a NFT getting minted. In a couple minutes after minting, your NFT will also be available on Opensea under your wallet.
Hope you enjoyed building this! Web3 is just getting started and thirdweb is building the underlying infrastructure to help make web3 mainstream. Let me know if you have any questions on Twitter @aryxnsharma!