🎉 ⏱ Ready to build? Get early access now!⏱ 🎉

How to create an NFT-gated website
NFTs can be used as a membership, in this guide we'll show you how to setup a website that restricts content based on owning one.
Setup NFT
- Go to https://thirdweb.com/dashboard, connect your wallet and select the network you want to deploy to.
- Create new project (if you don't have one).
- Add a module: Bundle Collection (ERC 1155).
- Add a name and description for your collection. (This will be displayed when users view the collection page on Opensea).
- Click Deploy → confirm both steps in your wallet.
- Click Mint on the top right corner to start minting your Membership NFT.
- Add a name and description for your individual NFT. (This will be displayed when users view the individual NFT page on OpenSea).
- You can mint multiple NFT's which represent different tiers of membership.
- Your NFTs have now been minted, and after a few minutes will appear on Opensea under your collection.
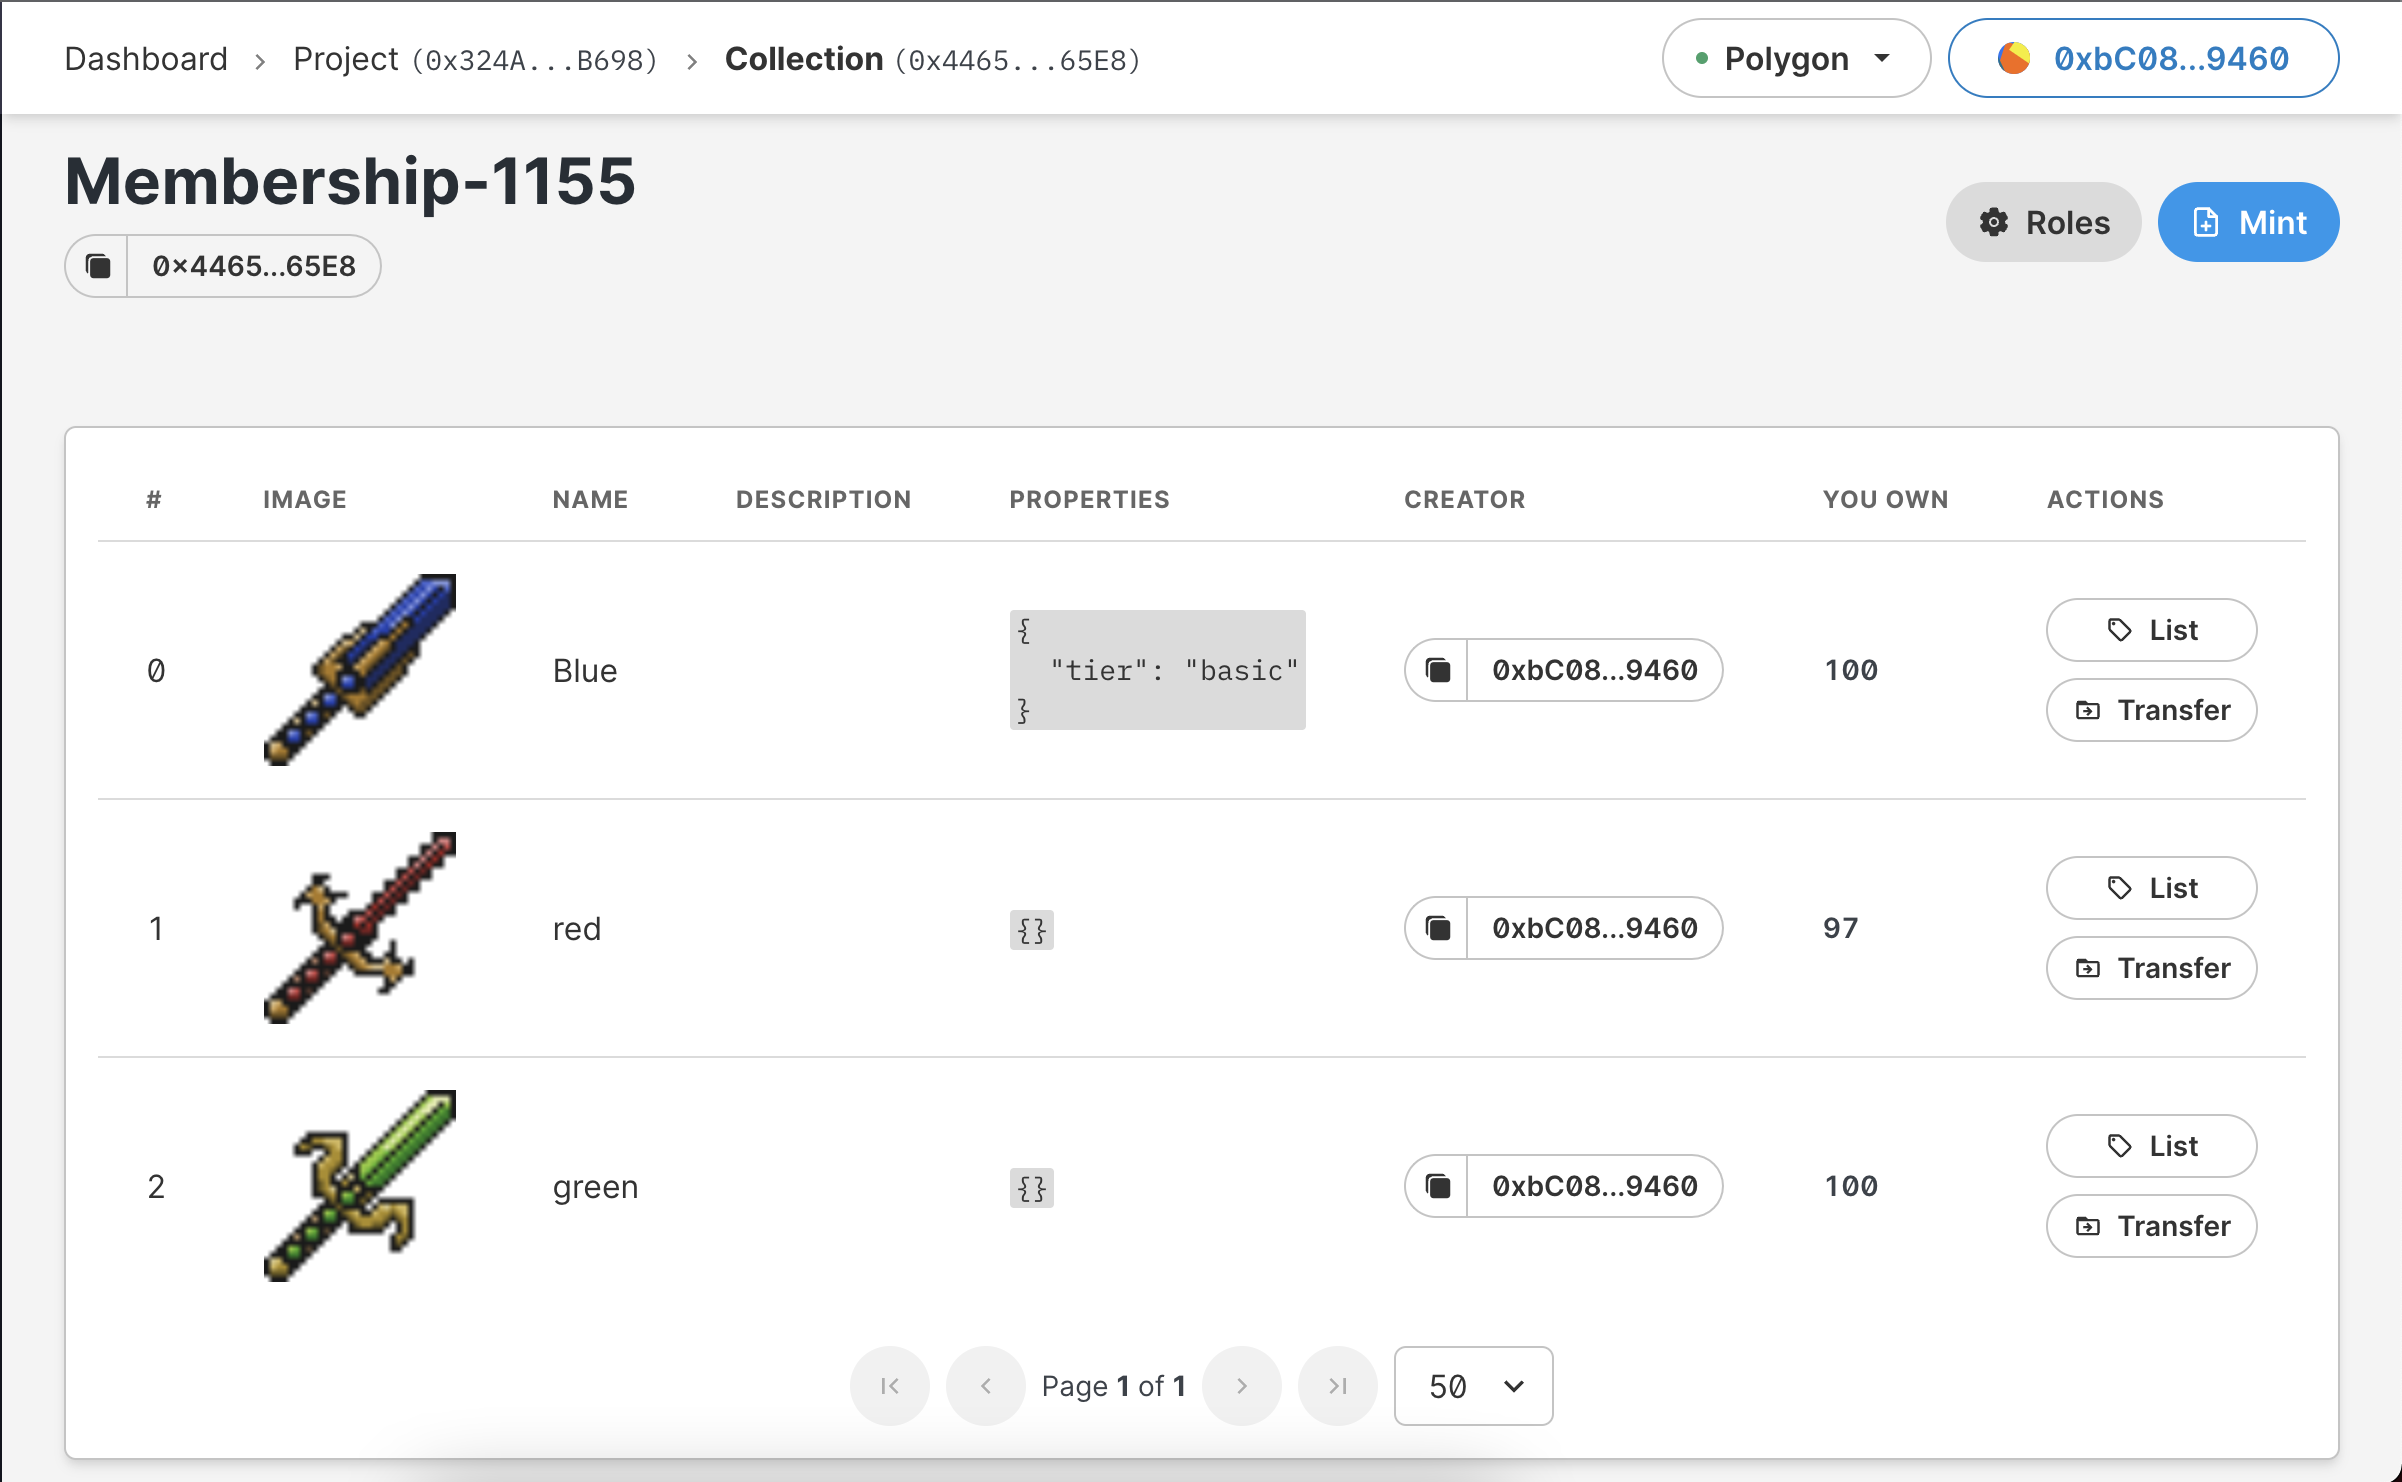
thirdweb collection dashboard with 3 tiers of membership NFTs. (blue, red, green).example on OpenSea: https://opensea.io/collection/membership-1155
[0x4465...65EB] is your NFT contract address.
Let's write some code
We're going to setup a private section of our website for our NFT holders. In this guide, we'll be using React and the Javascript SDK.
1. Install the SDK in your web project
npm install @3rdweb/sdk ethers
2. Install React web3 libraries for Metamask Wallet Connect
// A few different options, pick one that works for you! // In this guide, we'll be using @web3-react/core. // Alternative options: @usedapp/core (<https://usedapp.io>), bnc-onboard (<https://docs.blocknative.com/onboard>), and more. // source: <https://github.com/NoahZinsmeister/web3-react> npm install @web3-react/core @web3-react/injected-connector
3. Set up @web3-react in your project.
In the entry point of your React page. In Next.js, it would be pages/_app.js. In React, it would be in your app.js.
import { Web3ReactProvider } from "@web3-react/core"; function getLibrary(provider) { return new Web3Provider(provider, "any"); } export default function ({ Component, pageProps }) { return ( <Web3ReactProvider getLibrary={getLibrary}> <Component {...pageProps} /> </Web3ReactProvider> ); }
4. Gate access
In your React component, you can gate access based off the balance of the NFT in the connected wallet.
import { ThirdwebSDK } from "@3rdweb/sdk"; import { ethers } from "ethers"; import { useWeb3React } from "@web3-react/core"; // Get the Membership NFT info from your dashboard. (thirdweb.com/dashboard) const MEMBERSHIP_NFT_CONTRACT_ADDRESS = "0x4465aE876e5263cB4Eaf42948723E28bB30C65E8"; const MEMBERSHIP_NFT_TOKEN_ID = "0"; const useWalletMembershipAccess = () => { // react states for chechking if user can access or not const [access, setAccess] = useState(false); const { account, library } = useWeb3React(); async function checkWalletMembership() { // Get the connected wallet Signer const signer = library.getSigner(account); /* Our SDK takes in a valid Signer or Provider. A signer can perform READ and WRITE calls on the blockchain. A provider can only perform READ calls on the blockchain. read more: <https://docs.ethers.io/v5/api/signer> */ const module = new ThirdwebSDK(signer).getCollectionModule( MEMBERSHIP_NFT_CONTRACT_ADDRESS, ); const balance = await module.balance(MEMBERSHIP_NFT_TOKEN_ID); return balance.toNumber() >= 1; } // check wallet when account is connected if (library && account) { checkWalletMembership().then(setAccess); } else if (access) { // reset the state if wallet is disconnected setAccess(false); } return access; };
5. Render your content conditionally
Use the useWalletMembershipAccess to render your content conditionally in your React components! An example:
const MyComponent = () => { const hasMembershipAccess = useWalletMembershipAccess(); return hasMembershipAccess ? <Text>Render Member Only Content</Text> : null; };
You can check the code on GitHub here: https://github.com/thirdweb-dev/nextjs-membership-lounge. Repl.it demo: https://replit.com/@jakeloo/nextjs-membership-lounge
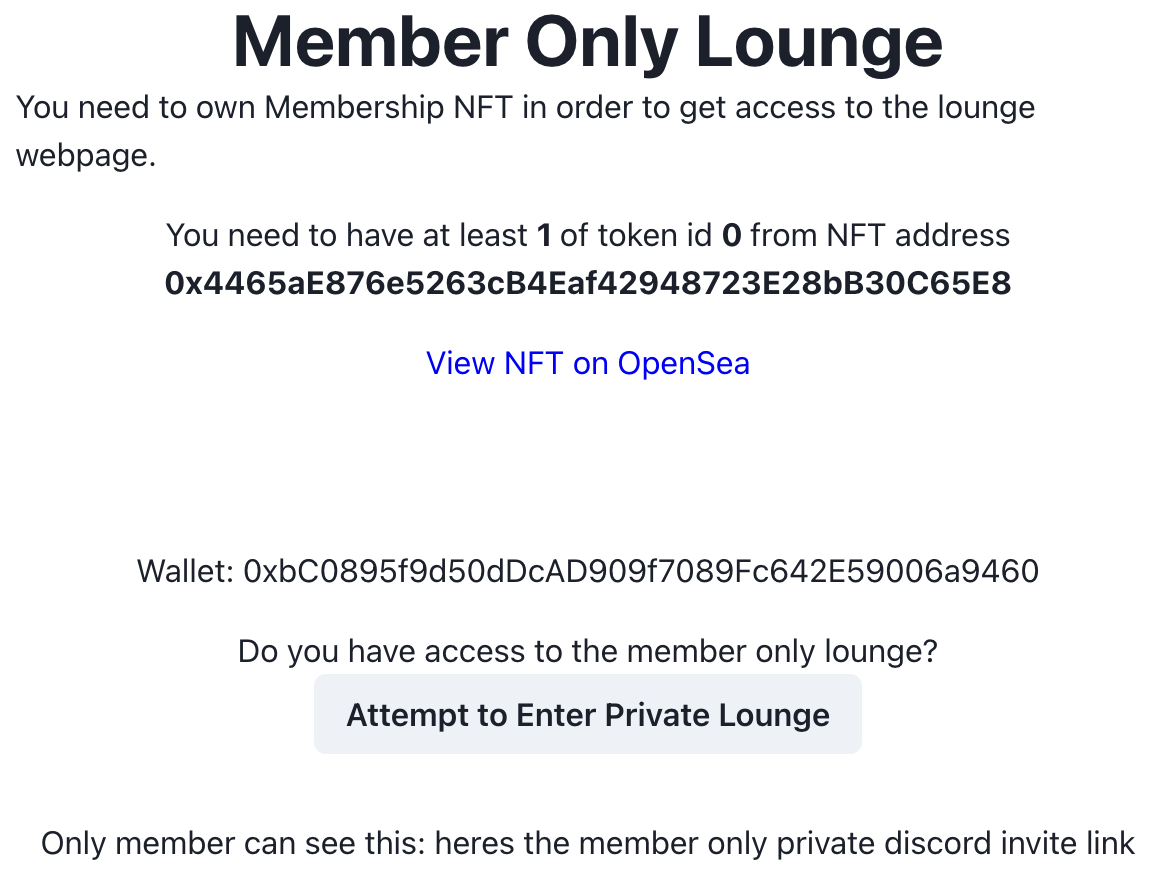
Member only lounge